Showing posts with label videos. Show all posts

Wednesday, March 16, 2011

Charm Dangle-icious-ness!

I made the Charm Dangle to hang from a mini album ring. I added charms that fit the color scheme of white and cream. It was going in with my swap with Olga for the Fairy Bottle Swap (more details on that tomorrow) and so the charms relate to that!
I am also submitting this charm dangle to Drew at Scrappyhappiness.com for the Live With Prima Jewelry Challenge! Wish me luck!
Thanks for stopping by today!
Leslie


Click on photos for a better view!

Monday, November 8, 2010

Vintage Mini Album or Signature Book

Today's post is a long one! Its full of photos, details, instructions, and 3 videos!! My grandmother turned 85 yesterday. We had a huge "reception" party for her. Very fancy. I offered to make a book for guests to sign. Well, let's just say that the vintage style of my book was a complete contrast to the decor to put it mildly! However, my grandmother LOVED it!

This book was a signature book, but could just as easily become a mini album with other decorated pages instead of the lined papers I used.

Front cover is below.

a 003

Inside Front Cover is below. Each ad was significant to my grandmother!

 a 005

Back Cover is below.

a 009

Front Cover Detail is below. I LOVE these metal frames. 

 a 015

Prima Say It With Pearls – cut off and use just the portion you want! See photo below.

a 016

Technique for the embellishment on the Front Cover: Emboss Resist

a 013

The technique I used for the cover is called Emboss Resist. Here are the instructions for what I did:

  1. Ink and distress the background cardstock or designer patterned  paper that you will want to show through. I inked (to age) and stamped an image that I wanted to show through. Using patterned paper will work great too! Just remember that what is on the base below the embossing powder will show through in the end. Make it something dramatic!
  2. Before you do the next step, rub an Embossing Buddy (corn starch puff) over your cardstock/paper. I ALWAYS forget to do this and end up with a paint brush trying to remove the excess embossing powder. Ugh! I used a stencil (the cheap kind of paper stencils from the hardware store) for the numbers on the background paper. You could use a stamp instead! I laid the stencil down and inked the area with VersaMark ink. If you use a stamp, just ink the stamp with VersaMark! I then removed the stencil.
  3. Cover area with CLEAR embossing powder and heat emboss.
  4. Rub a darker color ink (any color) all over the paper and the embossed area. You can do this in a distressed fashion or more solidly. Wipe the excess ink off the clear embossed area. You will now have a "peek thru" to the base paper! Super simple!

a 017

Here's a Hot Tip for those of you who are new to distressing and inking edges. Using more than one color creates great depth! Use a lighter color to rub in a bit around the border, maybe 1/2 or 1" deep. The second color should be darker and you only apply it to the edges, barely allowing it to come onto the top surface of the paper. You could use 2 shade of red or two shades of green. Match it to whatever you are doing!

Here is the quote from the Tim Holtz Visual Artistry stamps that I used.

a 012

Here is the pdf version of the lined paper I used for the signature book. This is loaded on scribd, but you can also email me for a direct copy at creativepzazz at gmail dot com.

a 008

Thanks for stopping by today!

Leslie

Sunday, August 22, 2010

Charm Swap

These are the charms from the charm swap with Cindy from Life on the ScrapBeach. If you aren't a member, click on the link in my right side panel and join. It's FREE, and there are tons of great ladies on there that are so helpful! Plus, giveaways, videos, and swaps are available each month!

I love these charms. They are so pretty! I can't decide which is my favorite! More importantly, these charms inspired me in directions I wouldn't have thought of going otherwise!! Check out the video of the charms. Enjoy!

Thanks for stopping by today.

Oh, can you give me your opinion of the sound quality for the videos? I know I mumble at times, but in general is it loud enough?

Thanks, Leslie

Saturday, August 21, 2010

Satin Flowers: The Posy or Peony

There are 100s of videos on YouTube about how to make lollipop flowers with satin fabric, a candle, and some hot glue. The video I have made for you is a twist on the lollipop flower. You'll see samples of each in the video!

These flowers remind me of a posie or, if you add several layers, a peony or rose. In my opinion, the lollipop flowers look great for clean and modern layouts, while these layered flowers continue the vintage theme really well. Of course, you can interchange them all to suit your needs!

Layer a larger flower with a smaller flower before you add the center for a fuller flower! Don't forget to use larger circles to make larger flowers too!

Thanks for stopping by today!

Leslie

Friday, August 20, 2010

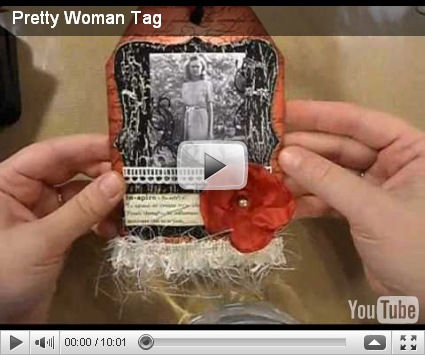
Pretty Woman Tag

I made my first tag!! Well, I have made Christmas tags before, but this is what I call Tag Art. I won't be using these tags as tags. I plan to place them in a book, sort of like a mini album of tags! Remember: click on the photos to see a larger view!!

 SDC14876SDC14891    SDC14883 SDC14895      

Carlene the Pink Scrapper hosted a swap for August, and the theme was Pretty Woman. I decided to use a photo of my grandmother. I love things from the 40s. I think it is my favorite decade. So, I thought a photo of her from 1944 would be great!

SDC14880

SDC14882SDC14878SDC14892I used pearls below the photo on the swap tags and black beaded trim at the base. I didn't have enough of the tiny trim I used below the photo on the tag for my grandmother or the vanilla trim I used at the base of her tag. It all worked out well though! They both look great! To me, at least.

My tag was themed around her as inspiration to the rest of us. I added a hope ribbon charm because she has survived kidney cancer (they gave her 6 months to live over 6 years ago) and bladder cancer (three times so far)! I am inspired by her strength, so ISDC14887 decided to add the definition of inspire and the word inspire stamped on the tag. Besides cancer, she has survived atrial fibrillation (abnormal heart rate), where they have to shock you with the "paddles" to get it back in rhythm. She went through that 3 times. It never worked. It basically kills you for a second or two, not to mention the pain of an all over extreme body contraction! She has a pace maker (recently placed) to help keep her heart rate from going so slow too! She had two strokes and was still 100% the same as before the strokes. She just had another stroke two weeks ago, which she is still recuperating from, but she should recover completely from it too!

Here is a video with all the tag details. I also have a video for the flower coming tomorrow!! For any further info about what I did or how, email me at CreativePzazz at Gmail dot com.

Did you lose count?

  • Cancer X 4 (with a death sentence of 6 month over 6 years ago)
  • Stroke x 3 (and still the same after all)
  • atrial fibrillation (basically killed by the defibrillator paddles 3 times)
  • Pace maker

Amazing, right? She is strong and it is all because of her faith in God. So, I dedicate my tag to her!

Thanks so much for stopping by today! Hope you enjoyed the video!

Leslie

Tuesday, July 27, 2010

It's a beautiful day! I just got home from the Neurologist! There is still no change in my MS, but on Spetember 5th I will be celebrating my 5th anniversary without ANY relapses!! 5 years is a big deal in the cancer world! I have no idea if it is a big deal in the world of MS (I forgot to ask the doctor!). BUT I am celebrating like it is! Woo Hoo!!

For today's project, I have a video showing you the canvas that I made for one of my daughter's friends. It was well received by all the kids at the party. Plus, it was easy to make!

I will show a video soon about how I made the flowers. There are thousands of videos for making the satin lollipop flowers already on YouTube, but I make one a little bit differently! My girls go back to school Aug 6th, so I will have more posts and videos after that. I can't promise anything before that. They are demanding little divas, right now! LOL

Enjoy!


Thanks for stopping by today!
Leslie

Tuesday, July 13, 2010

DIY Charms

There are two posts today! There is a card posted after this series of videos! Enjoy!

Today's project is to show you how to make your own charms to go on your tags or scrapbook pages, or to hang on mini albums.  I made these charms for a charm swap that I entered on the Beach. See my link on the right panel or go to Life on the Scrap Beach and join for FREE. I think there are a couple of spots left for this charm swap, if you are interested in joining!

Basically, I was supposed to make 8 charms, they needed to have a bead or button, and they had to have a pin or something to attach it with. I used the pins I made in yesterday's post as the attachment because I didn't want any beads on these particular charms. To meet the requirements, I added some spacer beads and seed beads on some safety pins (that I did not alter like yesterday's pins), and I will send those for each participant as well.

For full instructions watch the video. Sorry there are two parts, but I wanted to share all the tips I learned by doing this process!

Supplies used:

  • Ultra Thick Embossing Enamel (UTEE) in platinum
  • Versamark Ink Pad
  • Heat Gun
  • Needle tool or Tweezers

To make the Heat Proof Tile:

  • 12" ceramic tile (don't go to any expense here, the cheaper the better, in case it breaks)
  • Flat backed marbles (from Michael's)
  • E6000 glue (or other industrial strength glue, such as Gorilla Glue, Goop, etc.)

So after I prepared these charms, I found out that the rest of the ladies in the swap were making charms that were more like Bling than vintage, so I am making different ones! Here is the video about those.

Here is a video showing all the charms, both styles, completed! Plus two things I was working on Sunday afternoon.

Please leave me a comment here or on my YT! Look for a video about more flowers maybe next weekend. Thanks for stopping by today!

Leslie

Sunday, July 11, 2010

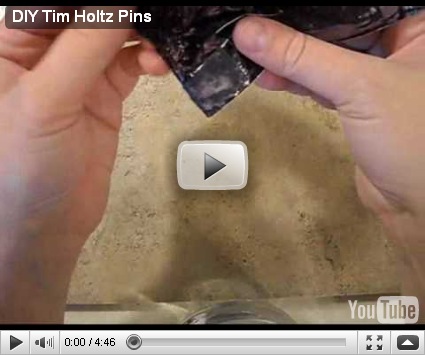
DIY Tim Holtz Embellishment Pins

Today's project is to show you how to make my own home made version of the Tim Holtz embellishment pins. While I would love to buy EVERY Tim product there is, the reality is that I have to pick and choose. I had been wanting some pins like these, but just couldn't let myself get them. Well, now I can make my own, and so can you!

Supplies used:

  • Safety pins (any size—the cheaper the better, check the dollar store or your sewing kit)
  • Alcohol ink ( I used black)
  • Zipper style bag (learn from me and check to see if it has leaks before you start!)

Leave me a comment here or on YT! Thanks for stopping by today!

Leslie

Thursday, May 20, 2010

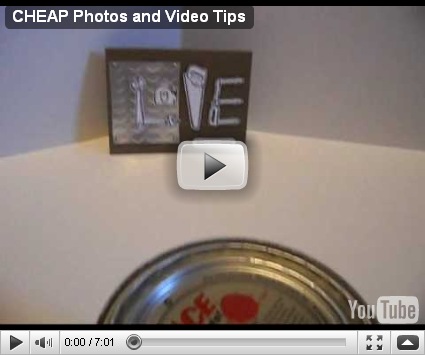
Photo and Video Tips

I hope you noticed yesterday's post. I am having problems with Blogger scheduler for the posts. Anyway, yesterday's post is below the post from Tuesday!

For today, here is a video I made from requests that I have gotten. It goes through my set-up of how I take photos of my projects, plus a mention of how I video. It cost me around $3.00! Just check out the video. I only use my camera. You can click here to see what camera I use to do this. Someday I will get a Flip or other video camera, but for now, it is my trusty digi cam!
One thing, I forgot to mention in the video, is lighting and sound. I haven't gotten anything perfected yet! But here are the technicalities that I have learned from reading.  For lighting, the important thing to remember is natural light is better than regular lights. It gives a truer color and more clear photo. However, don't think that you should film with bright sunlight. You want natural filtered light. Film in front of a window, but if the sun is bright through it, place a white curtain or shade between the window and the video set up.
Also, notice shadows that you are creating as you video or photograph something. I have seen several videos where people have a light that faces the camera, but this creates shadows that make it hard to see the image or project. There are fabulous tutorials out there in YouTube-land, but it is so hard to see what the people are doing that I can't follow along well. So, put the light beside the camera, and you will get better results. If no natural light is available, then use a lamp with the light aimed at your workspace and plenty of overhead lighting.
Finally, I needed to mention sound quality. My sound quality is not great. I need major improvement in that area. My sound is recorded through the camera. With Flip and other video cameras, sound quality will be better. However, you can get by without anything fancy, if you just speak up.
My biggest tip is for you to make a practice video. See how the lighting, sound, and shadows are. Then adjust and create the real deal!
Good luck and enjoy!
Leslie

Saturday, March 13, 2010

Punch Art Mouse: Before & After

OMG!!! (As my daughter says!) Yesterday's post was supposed to post today, and today's post was supposed to post yesterday! I got the dates all mess up!! Well, let's just say that the mouse referred to and shown in yesterday's post is explained in this post and video! Hope you enjoy!

Today's project is a Before & After using punches. Who is to say that an ornament punch has to be an ornament? Not Ellen Kemper! She is the punch art queen!! All Hail the Queen! I got the idea for this mouse from Ellen, and then took him in a direction that will embellish my project for tomorrow! Yes, you are 24 hours away from finding out what project actually started this whole series!! I am so excited, I can hardly wait!! But, I have to, because I am "trapped" into doing this series bit by bit.

punch mouseHave you figured out what tomorrow's project will be yet? I have been giving hints all week. (Editted to add: Of course, you have figured it out! It posted yesterday!)

Today I have a video showing you exactly how to make this super cute mouse! It uses several punches. If you do not have the punches, you can freehand cut out some shapes, or place an order with me for what you need! Just call or email me.

What the video does not show: (Sorry I am still very new at videos!)

  1. Me attaching the tail. Very simply, add a drop of glue to one end and press onto the back of the mouse.
  2. Using the Stampin' Write marker on the whisper white square to make i a "newspaper".
  3. Cutting the tooth. It is just a tiny rectangle of whisper white.
  4. Using a sponge dauber to add a bit of pink to his ears and cheeks. The sponge daubers are smaller than a regular sponge, so they work better in this situation.
  5. I did not add whiskers, but you could, just by drawing some in with the Black Stampin' Write Marker or by cutting VERY thin pieces of cardstock.

Thanks for stopping by today, you can check out the post that shows how I used this mouse here!

signature

Products used in this project:

  • Wide Oval Punch
  • Small Oval Punch
  • Ornament Punch
  • 1 1/4" square punch
  • 1 1/2" circle punch
  • 3/4" circle punch
  • Heart to Heart punch
  • Sponge daubers
  • Stampin' Write Marker in Black

Friday, March 12, 2010

Before & After: Grand Finale!

Well, I have been giving hints all week long about today's project! I am so exited about it! I am going to show you how to make a Mouse Trap Note Holder!!

I have been so excited because it is such a Out of the Ordinary project! It is just hilarious to me! And simple to do!

a 019

Isn't it cute! And such a conversation starter! What a great gift to cheer someone up! They will have to laugh at this!! The one pictured above is for a friend of mine, and then I will make one in the video using the Punch Art Mouse I made yesterday. Well, what do you expect? I couldn't make a Mouse Trap Note holder without a mouse on it!

The video actually uploaded to YouTube early yesterday. Sorry about that! It gave away my surprise!

Thanks for stopping by today, and leave me a comment about your opinion of today's project! Was it too much hype for a boring project, or were you "trapped" into creating your own? LOL

signature

Supplies for video project:

  • Welcome Neighbor Designer Series Paper #
  • Pumpkin Pie Classic Ink #
  • Pumpkin Pie Striped Grosgrain Ribbon #
  • Sanding blocks #

  • Mouse Project supplies (click here to visit that post)

Monday, February 22, 2010

Blog Candy Video

Today I wanted to remind you that I am giving away Blog Candy!! You have until 11:59pm on February 28 to leave a comment on the original Blog Candy post! Click here to go to that post. There are so many of you that are sending me emails about the Blog Candy, but you haven't commented yet. One of those people gave a reason as to why… she seems to be unable to post a comment because she doesn't have one of the accounts that are in the list. I know… confusing. Well, apparently some of you may have difficulty posting comments directly to my blog posts. If you seem to be experiencing difficulty, you may post as Anonymous, then leave your name in the comment. I think that will solve the problem. If you still have problems, email me. I will certainly count emails at that point. Thanks for the heads up on the problem too.

So today I thought I would share a video I made of all the things I am giving away as blog candy. I recently cleaned my craft room, and I am giving away some things that I will never use, plus more!

Hope you are excited! You will receive:

  • Over $11 in ribbon
  • Over $13.00 in patterned paper
  • Over $17.00 in miscellaneous craft supplies and storage containers
  • Plus, random ephemera gathered over the years!!

A complete value of OVER $41.00! WOW!! That is not including the FREE shipping!!

Don't forget to invite your friends to comment for extra chances for you to win!!

Thanks for stopping by today!

signature

Sunday, February 14, 2010

Sucker or Lollipop Holder VIDEO!

Happy Valentine's Day!

Here is the video tutorial about how to make your own Sucker Holders! Also, there is a Hot Tip about making your own FAUX Ticket Corner Punch!

Please leave a comment! For more information about the products used in the video or for complete written instructions, please visit this post.

Thanks for stopping by.

signature

Do you like to scrapbook, make cards or gifts, or create your own home decor? Do you like getting discounts on your craft supplies? Have you ever thought about working for yourself either full-time, part-time or sometimes? Do you need extra money in your pocket? Join my team! Get your Starter Kit today for only $169 (regular $199) filled with $335 worth of products! You can even pick the products you want in the kit! Earn a FREE stamp set just for signing up! AND get a great handmade gift from me for joining my team! For more information click on the JOIN MY TEAM button in the right column.

Friday, February 12, 2010

Snow Day!!

NOTE: This post will serve as my post for Saturday. If you didn't know, I write all my posts at night, then schedule them to post the following morning. Because of the special circumstances of this post, I am posting live now. Also, this post contains a lot of photos and a video. I apologize if it takes a long time to load for you. The video is of my family playing in the snow. It is raw, has noises, and poor quality at times, just like us!!

Today was a complete SNOW DAY for us!! I did no crafting or craft research today because I was taking pictures and having fun with my girls!! We got around 4.5" of snow, and we all were like kids in a candy store! We've all been up since before 7am, and we are all still hyper at 8:30pm!
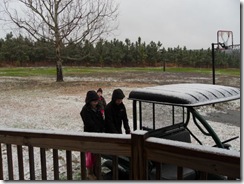
AM17am…snow just started, the girls couldn't wait. They are making a snowman, and then made a snow angel!

WHY?? You see, snow is rare in south Alabama. Really rare. The last snow we had was in 1993, seventeen years ago, and the snow before that was in 1973, a 20 year span. Some of you live in areas, such as New Hampshire, where snow is the norm, and is viewed as a nuisance at times. Here snow is such a big, exciting deal, and we LOVE the mess, the blocked roads, and being out of school!! Whoo-hoo!

SM1 7:30am…First snowman. 8" high.

dogs 9am… Bogey and Birdie loved the snow!!

later 10am…all the footprints are covered again!

sbfight 10am… Andy and the girls having their first snowball fight!
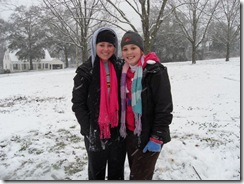
midday1 11am… 3" of snow. This is Mallory (BFF) and Megan (right), my oldest daughter.

midday2
11am… Meg making a snowman.

midday4 11am… Syd, my youngest, making her own snowman.

midday
11am… Andy helping Meg. There were as many leaves in this snowman as there were snowflakes!

moms 1pm… my mom's house.

tims1pm…Uncle Tim's house. BJ1pm…Betty Jean's house.

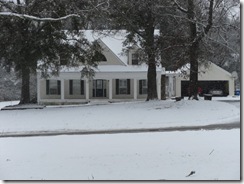
gaffords1pm…Gafford's house. house1pm… my house from Highway.

memas1pm… Mema's house. pansies1pm… Mema's pansies. pines1pm… Beautiful pines.

big snowman 2pm…Final snowman of the day.

The video is a compilation of all video taken during the day. It is chronological, so you can see the progression of the snow. It ends when my oldest daughter falls down the concrete steps. She is fine, but has a bad bruise on her back. In all our hyperactivity of the day, it was bound to happen.

Hope you enjoyed the photos today. Maybe those of you in Cali, Arizona, and Tampa can look at them and be jealous live vicariously through us! To leave a comment, please click comments under my signature, and you can type in your comment.

Thanks, Leslie
signature