Showing posts with label Cards. Show all posts

Thursday, July 22, 2010

Birthday Card #11

Today's card uses Melon Mambo cardstock. I used Melon Mambo ink to stamp the sentiment in the background. I stamped the cake image on white cardstock, punched it out with a circle punch, colored it, and glued it on with dimensionals after punching a hole in the front of the card too. I then took my scallop circle punch and punched evenly around the circle and glued it around the front hole. Adding the ribbon bow helped bring the white to the other side of the card.a 034 a 035 a 036

Try placing your image inside your next card. Add a hole or window in the front of the card to give a peek at the image. This way there is a treat inside and outside of the card!

Thanks for stopping by today!

Leslie

Wednesday, July 21, 2010

Birthday Card #10

Today I will show you another masculine card. I used the basic gray and Crushed Curry cardstock again.

For this card, I distressed the edges using Tim Holtz's distressing tool and added eyelets with linen thread through them as a border. I stamped in Staz-on ink and then cut the measuring tape from the Totally Tools stamp set from SU! out of soda can metal. I attached it with dimensionals. I stamped, inked and distressed the sentiment and attached it with dimensionals too. Notice that I changed a word of the sentiment to a word that worked both with the sentiment and the stamped measuring tape. Try to look at your images and sentiments in new and exciting ways!

Then I looked at it. The tape measure was hanging there in mid air. "They" say to add a line or something under a stamped image to keep it from "floating" in the middle of an open space. I added a Modern Label punch, which I trimed on the ends to make it be a log shape. I stamped it with my woodgrain background stamp and inked the edges. I sponged on gray, soft suede, and walnut inks to add the depth and color for the log. I do like how it turned out. In hindsight, I would have stamped the Crushed Curry cardstock with the Woodgrain stamp too.

Hot tip: Do not attach anything until you have done a "dry fit" first. Lay everything out and on top of each other before you glue anything down. then you will be able to see if you need to add a background stamp before it is too late! I'm obviously still trying got learn this lesson.

 a 042 a 043

Thanks for stopping by today!

Leslie

Tuesday, July 20, 2010

Birthday Card #9

Today I will show you card #9 in this series.

First, I have been asked how do I start by making a card. What gives me the inspiration for each card. Well, there are so many sources of "sketches" out there. If you google "card sketches" or "scrapbook layout sketches", you will receive millions of hits to great sites that have these basic blueprints for you. You can then change them up to suit your taste and needs. I haven't yet used one of these sketches, which are usually done by people with a lot of design experience and knowledge. I have none of that. I have just seen things that I like as I am blog hopping or watching videos. I watch for color combos that I really like, for example in today's card with the yellow and gray. I try to push myself with my style, techniques, and layouts, so I don't do the same thing over and over. I am sure a graphic designer could pick apart my cards and tell you 1000 ways they are wrong in terms of design, but they looked good to me.

My biggest advice is to choose colors or paper that you love, pick out some coordinating embellishments, and choose a layout either from your imagination or from a layout/sketch source. What I did, for these 12 cards, was to sketch the design on a piece of paper for each card. I sketched where the sentiment would go, where the stamped image or patterned paper would go, and where the ribbon or embellishments would go. I even marked what colors each item would be. By sketching it first, I saved all that EMPTY planning time that happens when you have all your supplies staring at you and you can't figure out what to do with them. Doing it this way took about 15 minutes of sketching and gathering supplies. I spent about 10-20 minutes per card, most were 10 minutes. Then I started creating. Every single one of my card sketches worked except for Card #3, which didn't work because of the clock I had planned, but the sketch and design were still good without the clock. (See that post for more info.)

So the next time you need to create a card or scrapbook layout, start with a sketch..either yours or someone elses! You can even look at someone else's card and make a sketch from it! Keep your sketches, so you can use them again!

So, here is the card for today and good luck making your own cards! Again my camera spazzed out and didn't show the colors well at all! This is a basic gray color with Crushed Curry cardstock. Very bold, modern, and masculine.

a 040

The plastic embossed piece in the center was packaging from a Tim Holtz package. I used my Treadplate Embossing Folder I got from Michael's to give it the texture. I added the eyelets to hide the glue dots that I used to attach it. Yep, I could have used the eyelets to attach it, but that was an after thought. I used linen thread to tie on the tag that is made from metal from a soda can. You can see a video on how to get and use this metal in the Videos category in the right side panel. I punched 2 circles from the metal, one I embossed with the same embossing folder, and the other I stamped using Staz-on ink. Be careful, it took me 5 times to get the stamped image clearly stamped. The stamp will slip with you. Straight down and straight up…and do not have 3 cups of coffee before you do this. Finally, I glued the two circles together and used my Tim Holtz distress tool to distress the edges.

 a 039

Thanks for stopping by today!

Leslie

Monday, July 19, 2010

Birthday Card #8

Here is card #8 of 12.  This is pretty in pink cardstock stamped with pretty in pink ink using the Tres Chic background stamp from SU! The background stamp and the tag do not really match in style, but I liked the idea that all the words of the background stamp were things I consider blissful.

 a 032

Thanks for stopping by today!

Leslie

p.s. a new technique video is coming soon! Stay tuned!

Sunday, July 18, 2010

Birthday Card #7

Yep! There are still more cards coming your way! I can't show you the mini album I am working on until I finish showing these cards. I was super busy this week, next week too, working at the library teaching the summer reading program. These cards are a nice way for me to keep posts coming your way for inspiration! I will have a video for you later next week on a technique I learned by accident! I can't wait to show it to you! I am going to create a tag for you using the technique! I can't wait!

For now, here is another card. I tried to do something different on each card I made in this series. For this card, I really like the look of white and navy together. By adding the celery green, this card becomes modern, yet classic. By tearing the papers, it adds the interest that was needed on such a simple card.

 a 028 a 031

Thanks for stopping by today!

Leslie

Saturday, July 17, 2010

Birthday Card #6

Another card using the retired stamp set from SU! I wish I knew the name of it. So many of you have emailed me asking. I found it on Ebay last summer. 

The next time you create a card, try a monochromatic card and accent with very small amounts of color. It really highlights the area with color! Another great tip is to add piercing with your needle tool to create a border. I had planned on punching a scallop trim border along the top, but realized I had not done so AFTER I had attached it to the card. Rather than risk pulling it off, I decided some piercing might do the trick. I like it. Again, the attention is all on the stamped colored cups.

a 026 a 027

Thanks for stopping by today!

Leslie

Friday, July 16, 2010

Birthday Card #5

I made 12 birthday cards. Here is another one. I have been featuring one card per day.  a 018

Now why did my camera go dark for this shot? I wish I knew mroe about photography. I know just enough to snap 100 photos just to get 2 that I like! LOL

a 019

Don't forget to put a light piece of paper on the inside of dark cards for you to write on! Thanks for stopping by today!

Leslie

Thursday, July 15, 2010

Birthday Card #4

Here is another card I made. The pattern paper matches perfectly with the Sage Shadow cardstock from SU! It is hard to tell in the photo.  I love the Baroque Motifs stamp set from SU! It is my "go to" stamp set when I need a swirl!
a 015 a 016
Thanks for stopping by today!
Leslie

Wednesday, July 14, 2010

Birthday Card #3

Here's another birthday card I made. I LOVE the 1" satin ribbon! So lux! This card started as a sketch with a clock in the upper left hand corner.  I don't own a clock stamp, yet, so I was going to make one. That was a complete disaster! The numbers I had were way too big for the clock face I made. Since I had stamped the sentiment in the bottom right corner on the card, it was just too plain like that, so I had to stamp it on coordinating cardstock and embellish it up. It is still not what I would really like, but it will do.

a 010 a 013

Thanks for stopping by today! Oh, have you noticed the beautiful white background in these photos? It is my grandmother's quilted bedspread. Isn't it the prettiest background for cards?

Leslie

Tuesday, July 13, 2010

Birthday Card #2

Before I get to today's project, I want to say thank you to everyone who has stuck by me while I have been gone. Between my health, vacation, the girls being out of school, and the death of my mother-in-law, it has been VERY hard to post on a regular schedule. I am back now!!

I was commissioned (makes it sounds fancier- LOL) to make a set of 12 birthday cards for my aunt. I showed one in this post, but there are more. I will even be making a video to show an accidental technique for one!

Here's today's card:

a 007 

a 009

I used an old retired set by Stampin' Up!, but they have another one with coffee pots, etc. you can get now. The stamp of the coffee cup had a heart in the center, so I didn't ink it up and added the coffee beans instead, since the card was for a man! Hot Tip: Always look at your stamps in different ways! Ask yourself: can it be used for another season or can I ink up part to get a new effect?

Thanks for stopping by today!

Leslie

Thursday, July 8, 2010

Here is a card I made. I used Mellow Moss  and So Saffron cardstock-- retired from SU! and some of my favs.   Then I stamped the greeting on Very Vanilla cardstock. I got the greeting stamp set from Mike's, but I don't remember what brand it was. The Medallion stamp set in the background is from Stampin Up.
Thanks for stopping by today!

Wednesday, May 19, 2010

Birthday Cards for Mom

Today's post will show you the cards I made for my mother's birthday. She loved them! If you like the technique and would like me to make a video showing you how to do this, just leave a comment!
The first card is on Cameo Coral Cardstock with a Chocolate Chip mat. I used Mellow Moss (one of my favorite greens) to punch out some leaves. I have lost my leaves Sizzlit die, so I had to use the 5 petal punch. I sponged them with Mellow Moss. The roses are created on Shimmery White Cardstock (it has to be this type of paper). You stamp them in Versamark, emboss them in clear or white, then spritz them heavily with water. You add drops of reinker that swirl and mix to make these beautiful water color flowers! Both cards have different flowers done the same way.
a 202
This card is Cameo Coral with a Mellow Moss mat that was run through the Big Shot with the Plenty of Petals Embossing folder. I then lightly rubbed a sponge of Mellow Moss over the top. The sentiment is non-SU punched out with the designer label punch.
a 199
Thanks for stopping by!
Leslie
Below are photos from Mother's Day at my grandmother's house. We are standing in front of the old wind mill that powered the home until the mid 50's. My grandfather planted the roses that are growing in it now. The rest of the photos are of the flowers in my grandmother's yard.
a 225
The next photo is a close up of these roses in the wind mill. These are my second favorite flowers in the world!
a 217
The next 4 photos are of my #1 favorite flower ever! They are cabbage roses. I think they came from one of my great-grandmother's yards. These two roses mean so much to me. I have so many memories with my grandmother watering flowers and talking. These cabbage roses have the most sweetest scent that you can imagine. And to think that I don't care for roses (traditional ones) or the scent of roses. It is too strong for me. These don't even smell like roses.
 100_0202 100_0203 100_0204 100_0207 
Pretty Violas.
100_0244
A traditional rose.
100_0215
Another antique rose. I can't remember the name of this one, but I love it too.
100_0255
Love this bird house on this old stump. I love the shabbiness of it and the ornamentation.
a 241
These are called Knockout roses. My grandmother loves these because they COVER the bush with blooms.
 a 244
Another rose growing in the wind mill.
 a 251
Love this vignette of the greenery, the old water pump, and the water bucket of wild petunias. They grow back every year.
 a 259    
Thanks for stopping by today!
Leslie

Thursday, April 15, 2010

Happy BEARthday!

There is a Build-a-bear stamp set with the sentiment Happy BEARthday that I wish I had. I have wanted it several times, but just haven't committed to buying it. I probably will buy it one day and wish that I had bought it sooner!

a 003

So for this birthday card, I used the Build-a-Bear BigZ Die for the Big Shot and the Beary Accessories Sizzlit die for the clothes. The bear was a scrap that was lying on my desk for a while now. My daughter cut it from a scrap of poster board. It was very sturdy and survived being on my desk for several days. This is an accomplishment! I don't even survive my desk sometimes! So, I decided it would be a cute Polar Bear! I sponged the edges with Going Gray classic ink to just add a touch of color. The Polar Bears I see on Animal Planet are sort of yellow, but that didn't look so good. The gray makes her look like she needs to shave her legs! LOL

 a 004

The clothes (click for a closer view) were made using papers from the Welcome Neighbor designer series paper pack that I got FREE from Sale-a-bration! Her heart, bow, and belt area have Dazzling Diamonds on them. A girl's got to have some bling!

I attached the bear using SNAIL adhesive, but I put 2 dimensionals behind her hand to make it look like she is waving. I cut a 1"x4.25" strip of whisper white and punched it with the Scallop Trim Punch. I then cut about 1/2" off the bottom of the front of the card, then attached the scallop trim whisper white piece under the front edge as a decorative touch. The card base is made using Melon Mambo.

Hope you enjoyed this project! I enjoyed stamping and creating it! I haven't stamped much lately. I'm going to have to change that!

Thanks for stopping by today! Call or email me to place an order!

siggie

Tuesday, April 13, 2010

Candy Buffet Party Invitations

Today I am showing you an actual invitation that is being sent out for my cousin's daughter's birthday party. The theme is Candy Buffet. I will be showing photos when the party is finished, so just check back often for those. The party is April 24th. I have shown you over the past few days the samples I have made using My Digital Studio for the different decorations, etc. for the party. Using My Digital Studio is such an economical way to make samples! I can do hundreds of different designs for my cuz to choose from without wasting any paper or embellishments! Plus, I can change colors in a snap! Yippee!!

This photo is the complete invitation. Isn't it so cute?!

a 003

Thanks for stopping by today! Have a blessed day!

Leslie Jones To place an order or for questions…CreativePzazz@gmail.com

Thursday, April 8, 2010

Switcheroo!

Yesterday I showed a card that I made for Easter. Well, I never did actually deliver the card. There was just something that I didn't like about it. I LOVE the butterflies, but the card needed something. So today I thought I would show you how I changed it up! I like it a lot better!

a 008

Thanks for stopping by today!

Leslie Jones…CreativePzazz@gmail.com

Tuesday, April 6, 2010

Easter Card

I have to get a bit more organized so I can start showing the cards I make for a holiday BEFORE the holiday!

For the butterflies, I cut them from the Beautiful Butterflies die with the Big Shot, then I sponged on color. I used So Saffron, Brocade Blue, and then Taken with Teal on the tips of the wings. They are attached with Dimensionals.  The tab was punched from brocade blue that had been textured with the texture plates #1 and the Big Shot. Finally, I use the All Holidays stamp set and the Scallop Trim Punch on the edges of the sentiment.

Hope you like it!

a 005

Thanks for stopping by today!

Leslie Jones…CreativePzazz@gmail.com

Saturday, April 3, 2010

My Digital Studio Transparency!

Thank you all for the prayers and well wishes! I am much better! I can actually do things now; I am not stuck in bed! I haven't created anything yet with paper, like I am dying to do, because I am so far behind everywhere else in my life. hopefully this weekend I can show you a few things. I have some great ideas flowing in my mind that I cant wait to do! Plus, I have some AWESOME hauls that I got. Let's see, I got some things from Mike's, Target, Joann's, Scrapbook.com, and of course my favorite, Stampin' Up! I am so excited! I had been saving some money from Christmas and then got paid for a job, so I just had to spend it all… What? It was burning a hole in my pocket… Ok, so fine. I did all this ordering and shopping over a 2 week period. As soon as I made the final order, the following day my dishwasher died. So now I am washing dishes by hand for a few weeks. Do I regret my craft purchases? No, but don't tell anyone!

Anyway, today I was looking at some things online, watching videos on youtube, and fell in love with these transparency pieces that a girl used in a mini album she made. I can't remember what she called them, but they were small pieces that looked stamped or printed. She used these small pieces as overlays, of course, but also as a belt-like piece or as pockets to hold tags and journaling. It was so cute! That led me to think that I could make some awesome transparency pieces using the stamp sets included in My Digital Studio! I could even make some that are colored!

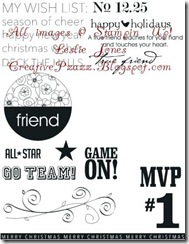
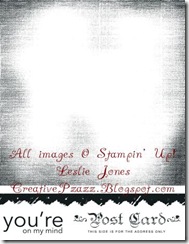
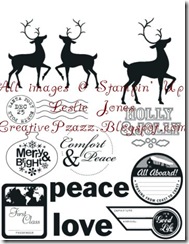
Here is what I came up with! There are borders and tags and more, oh my! Each sheet is 8 1/2 x 11 and is printed on a thermal transparency sheet (clear on both sides), because I scrap in an 8x8" size, but I mainly make mini albums. They are so fun! Each of these items are things that I thought would be great to use for scrapping.

To use them all you do is cut each one out individually using scissors or a craft knife. Attach them to your project with glue Tombow multi glue, then hide the glue in the corners using an embellie, or better yet, attach them using brads or eyelets! You can also hide the glue behind the areas that are printed. The most important thing to remember about transparencies on a scrapbook page or card is that they should be layered over something to get the full effect of a transparency. They are nice alone, yes, but if you wanted it alone, why didn't you print it on cardstock? Some of the elements that are in color have a white background. Just email me, if you are interested in purchasing, and I will let you know.

I was thinking about selling these transparencies, so if you are interested, please let me know. I will have to figure out a price, but if you are interested, I will work that up! They will be sold separately and as a group, so you can order what you would like! I will mail all of them in a padded envelope with a piece of chipboard as added protection. With My Digital Studio, we are allowed to sell 150 projects in one year. So I won't be breaking any rules in selling these. I can't wait to print my own!

Without further ado…

transparency1-001 transparency1-002 transparency1-003 transparency1-004 transparency1-005 transparency1-006 transparency1-007 transparency1-008 transparency1-009 transparency1-010 transparency1-011 transparency1-012 transparency1-013 transparency1-014

Thanks so much for stopping by today!

Leslie Jones