Showing posts with label tags. Show all posts

Sunday, August 22, 2010

Charm Swap

These are the charms from the charm swap with Cindy from Life on the ScrapBeach. If you aren't a member, click on the link in my right side panel and join. It's FREE, and there are tons of great ladies on there that are so helpful! Plus, giveaways, videos, and swaps are available each month!

I love these charms. They are so pretty! I can't decide which is my favorite! More importantly, these charms inspired me in directions I wouldn't have thought of going otherwise!! Check out the video of the charms. Enjoy!

Thanks for stopping by today.

Oh, can you give me your opinion of the sound quality for the videos? I know I mumble at times, but in general is it loud enough?

Thanks, Leslie

Friday, August 20, 2010

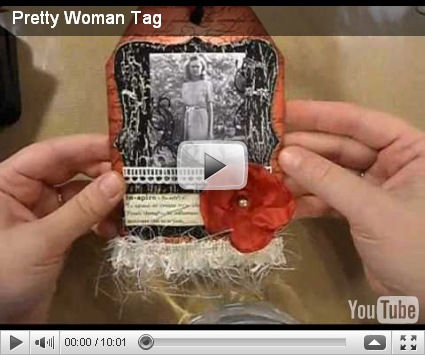
Pretty Woman Tag

I made my first tag!! Well, I have made Christmas tags before, but this is what I call Tag Art. I won't be using these tags as tags. I plan to place them in a book, sort of like a mini album of tags! Remember: click on the photos to see a larger view!!

 SDC14876SDC14891    SDC14883 SDC14895      

Carlene the Pink Scrapper hosted a swap for August, and the theme was Pretty Woman. I decided to use a photo of my grandmother. I love things from the 40s. I think it is my favorite decade. So, I thought a photo of her from 1944 would be great!

SDC14880

SDC14882SDC14878SDC14892I used pearls below the photo on the swap tags and black beaded trim at the base. I didn't have enough of the tiny trim I used below the photo on the tag for my grandmother or the vanilla trim I used at the base of her tag. It all worked out well though! They both look great! To me, at least.

My tag was themed around her as inspiration to the rest of us. I added a hope ribbon charm because she has survived kidney cancer (they gave her 6 months to live over 6 years ago) and bladder cancer (three times so far)! I am inspired by her strength, so ISDC14887 decided to add the definition of inspire and the word inspire stamped on the tag. Besides cancer, she has survived atrial fibrillation (abnormal heart rate), where they have to shock you with the "paddles" to get it back in rhythm. She went through that 3 times. It never worked. It basically kills you for a second or two, not to mention the pain of an all over extreme body contraction! She has a pace maker (recently placed) to help keep her heart rate from going so slow too! She had two strokes and was still 100% the same as before the strokes. She just had another stroke two weeks ago, which she is still recuperating from, but she should recover completely from it too!

Here is a video with all the tag details. I also have a video for the flower coming tomorrow!! For any further info about what I did or how, email me at CreativePzazz at Gmail dot com.

Did you lose count?

  • Cancer X 4 (with a death sentence of 6 month over 6 years ago)
  • Stroke x 3 (and still the same after all)
  • atrial fibrillation (basically killed by the defibrillator paddles 3 times)
  • Pace maker

Amazing, right? She is strong and it is all because of her faith in God. So, I dedicate my tag to her!

Thanks so much for stopping by today! Hope you enjoyed the video!

Leslie

Tuesday, July 13, 2010

DIY Charms

There are two posts today! There is a card posted after this series of videos! Enjoy!

Today's project is to show you how to make your own charms to go on your tags or scrapbook pages, or to hang on mini albums.  I made these charms for a charm swap that I entered on the Beach. See my link on the right panel or go to Life on the Scrap Beach and join for FREE. I think there are a couple of spots left for this charm swap, if you are interested in joining!

Basically, I was supposed to make 8 charms, they needed to have a bead or button, and they had to have a pin or something to attach it with. I used the pins I made in yesterday's post as the attachment because I didn't want any beads on these particular charms. To meet the requirements, I added some spacer beads and seed beads on some safety pins (that I did not alter like yesterday's pins), and I will send those for each participant as well.

For full instructions watch the video. Sorry there are two parts, but I wanted to share all the tips I learned by doing this process!

Supplies used:

  • Ultra Thick Embossing Enamel (UTEE) in platinum
  • Versamark Ink Pad
  • Heat Gun
  • Needle tool or Tweezers

To make the Heat Proof Tile:

  • 12" ceramic tile (don't go to any expense here, the cheaper the better, in case it breaks)
  • Flat backed marbles (from Michael's)
  • E6000 glue (or other industrial strength glue, such as Gorilla Glue, Goop, etc.)

So after I prepared these charms, I found out that the rest of the ladies in the swap were making charms that were more like Bling than vintage, so I am making different ones! Here is the video about those.

Here is a video showing all the charms, both styles, completed! Plus two things I was working on Sunday afternoon.

Please leave me a comment here or on my YT! Look for a video about more flowers maybe next weekend. Thanks for stopping by today!

Leslie

Sunday, July 11, 2010

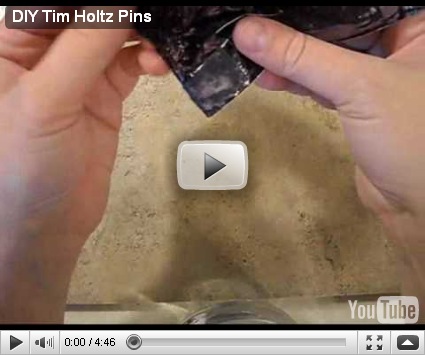
DIY Tim Holtz Embellishment Pins

Today's project is to show you how to make my own home made version of the Tim Holtz embellishment pins. While I would love to buy EVERY Tim product there is, the reality is that I have to pick and choose. I had been wanting some pins like these, but just couldn't let myself get them. Well, now I can make my own, and so can you!

Supplies used:

  • Safety pins (any size—the cheaper the better, check the dollar store or your sewing kit)
  • Alcohol ink ( I used black)
  • Zipper style bag (learn from me and check to see if it has leaks before you start!)

Leave me a comment here or on YT! Thanks for stopping by today!

Leslie

Sunday, May 23, 2010

Drink Tags Container

As I said yesterday, Syd ran off with the tin that Holly sent for us to put the drink tags she made in (check out yesterday's post to see what I am talking about). So, I had to make something for her to keep them in! What do you think?

The container is a 3 1/8" clear square box with clear lid. It used to hold:

a 018

Full of the drink tags…

a 035

Front view (the sides look the same, just no bow)…

 a 002

Top view…

a 007

I used STASH for this. The green polka dot paper is DCWV, the blue dot paper is Deja Views. The flower is Night of Navy and Really Rust. I clipped the scallop circle toward the center on each scallop to create individual petals. Of course, I crickled both and inked the center a bit with really rust ink. Everything was inked with Night of NAvy ink. The ribbon is Soft Suede. I really like the way it turned out. Oh, and the alpha set is new for me! It is from SU! Can't remember the name of it. Oops!

I can tell you this about my patterned paper stash: it is old. I bought two patterned paper packs from SU last year, 4 DCWV stacks last year, and the rest of my stash is older than that! I used to go through the patterned paper aisle at Michael's, when they had their sale on paper, and get at least one of every paper I liked. You can click here to see how I organize my patterned paper and see how much I actually have! I know! Right? It is ridiculous. I was/am a recovering paper addict. I am not sure if I am over it or not., but at least I can go to a store and not buy paper (I could never do that before) or buy just 4 or 5 pieces that are really awesome to me.  My goal now is to use what I have in my stash!

The problem is that some of it, I don't like now or it has sort of gone out of fashion. For instance, I got a DCWV stack back when they still wrote out Die Cits With A View on everything and they didn't call them stacks! I think it was around 2001 or 2002. Anyway, I HATE that paper now, and I have lots of it left. That is issue #2 with paper and me. I hoard it. I love it and don't want to "waste" it on just any old project. I want it to be used on "a good project". I am now making myself use it! Anyway, with the invention of glimmer mists—(or a mix of my own shimmer paint and reinkers with water/alcohol)—I can now change that paper into something better. At least a little bit anyway. I plan to try anyway.

I'll post about it when I do it.

Thanks for stopping by today. If you want the number to my "paper addiction" shrink, call 1-800-out-of-money! LOL

Leslie

Saturday, May 22, 2010

Bottomless Love Tub and Drink Tags

So after I blathered on yesterday about Feng Shui, I figured I better create something GREAT to share with you all to redeem myself in your eyes! Well, I did create something GREAT, but you'll have to wait. I am working up a tutorial for it! Don't fret! I have plenty more things to share with you!

I won blog candy from http://inkpaperstamps.stampincorner.com/ that Holly was giving away. She was giving away bottle flags, she called them. They were tags with a stamped mug on them colored to look like beer mugs! They were like wine glass markers, supposed to help you keep your beer identified at the party.  Well, I don't drink (remember I have Multiple Sclerosis, so meds + alcohol = NO NO!), so I asked her to make them coke floats in the mugs, because my daughter makes floats with her friends when she has a sleepover.

And so she did! She also went over board and made the cutest decorated tin! Check them out!

She made one tag larger for the guest of honor. She used (I assume) a blender pen or the aqua painters to color the soda in the mugs.

a 028 

These are the other tags. I just LOVE that mini tag the heart is stuck on. Don't forget to click on a photo to enlarge it.

a 029 

These are all of the tags. She used crystal effects, Dazzling Diamonds, and clear micro beads for the foam on the mugs. On one tag there was a errant black micro bead. She had the Fantabulous idea to make this tag be the "door prize" winner's tag! Since it is different compared to the others!! You could even plan this on your own tags!

a 034 

Here is the tin. My daughter confiscated it and is using it for her "treasures". It is magnetic on the bottom. Melon Mambo ribbon, if you were wondering.

a 009 

Cute Circle Circus center for the flower. Platinum Shimmer paint for the ink. Bling-a-licious in the center!

a 012 

She lined the inside and made this precious Japanese plum blossom punch art attached to the bottom.

a 014 

This is inside the lid. The green scallop circle is the base of the flower on top of the lid. (Great idea! I had not thought of that!)

a 016

What a GREAT blog candy!! Holly was so great and asked me exactly what I wanted! She has great ideas too! Drop by sometime and tell her hi!

Thanks for stopping by today!

Leslie

p.s. Since my daughter absconded with the tin for the tags, I made a new container for them. Check it out tomorrow!

Monday, April 12, 2010

Candy Jar Labels

Today I will show you the samples of the candy jar labels that I made for my cousin. She is having a party for her daughter, who will be 4, and the theme is candy buffet! It will be so cute! I will be posting photos of the finished party, so stay tuned!

So, I have been in charge of making the invitations, banner, tickets for the kids to purchase the candy, and the labels for the jars of candy. Yesterday I showed you the samples of the banner that will be put across the room. Today I will show you the labels for the jars of candy.

presleytags-001

You can see my notes to my cuz. She hasn't told me which ones we are using yet. I hope it is the striped one. We aren't doing a red and white striped awning over the doorway, like originally planned, but these are still the cutest thing to me!! The ones with the black brackets on them would be hand cut to the shape of the bracket.

Which would you choose?

Don't forget about My Digital Studio when you are planning a project. It is a great tool to make the samples, see what they will look like without wasting a bunch of paper! What a GREEN way to paper craft!!

Have a blessed day! Thanks for stopping by today!

Leslie Jones …CreativePzazz@gmail.com

Saturday, April 3, 2010

My Digital Studio Transparency!

Thank you all for the prayers and well wishes! I am much better! I can actually do things now; I am not stuck in bed! I haven't created anything yet with paper, like I am dying to do, because I am so far behind everywhere else in my life. hopefully this weekend I can show you a few things. I have some great ideas flowing in my mind that I cant wait to do! Plus, I have some AWESOME hauls that I got. Let's see, I got some things from Mike's, Target, Joann's, Scrapbook.com, and of course my favorite, Stampin' Up! I am so excited! I had been saving some money from Christmas and then got paid for a job, so I just had to spend it all… What? It was burning a hole in my pocket… Ok, so fine. I did all this ordering and shopping over a 2 week period. As soon as I made the final order, the following day my dishwasher died. So now I am washing dishes by hand for a few weeks. Do I regret my craft purchases? No, but don't tell anyone!

Anyway, today I was looking at some things online, watching videos on youtube, and fell in love with these transparency pieces that a girl used in a mini album she made. I can't remember what she called them, but they were small pieces that looked stamped or printed. She used these small pieces as overlays, of course, but also as a belt-like piece or as pockets to hold tags and journaling. It was so cute! That led me to think that I could make some awesome transparency pieces using the stamp sets included in My Digital Studio! I could even make some that are colored!

Here is what I came up with! There are borders and tags and more, oh my! Each sheet is 8 1/2 x 11 and is printed on a thermal transparency sheet (clear on both sides), because I scrap in an 8x8" size, but I mainly make mini albums. They are so fun! Each of these items are things that I thought would be great to use for scrapping.

To use them all you do is cut each one out individually using scissors or a craft knife. Attach them to your project with glue Tombow multi glue, then hide the glue in the corners using an embellie, or better yet, attach them using brads or eyelets! You can also hide the glue behind the areas that are printed. The most important thing to remember about transparencies on a scrapbook page or card is that they should be layered over something to get the full effect of a transparency. They are nice alone, yes, but if you wanted it alone, why didn't you print it on cardstock? Some of the elements that are in color have a white background. Just email me, if you are interested in purchasing, and I will let you know.

I was thinking about selling these transparencies, so if you are interested, please let me know. I will have to figure out a price, but if you are interested, I will work that up! They will be sold separately and as a group, so you can order what you would like! I will mail all of them in a padded envelope with a piece of chipboard as added protection. With My Digital Studio, we are allowed to sell 150 projects in one year. So I won't be breaking any rules in selling these. I can't wait to print my own!

Without further ado…

transparency1-001 transparency1-002 transparency1-003 transparency1-004 transparency1-005 transparency1-006 transparency1-007 transparency1-008 transparency1-009 transparency1-010 transparency1-011 transparency1-012 transparency1-013 transparency1-014

Thanks so much for stopping by today!

Leslie Jones

Sunday, February 21, 2010

Keychain

a 108a 109

Isn't this darling? The ribbon is some that was on some socks I got for Valentine's Day. (Before you cringe, fluffy soft socks are priceless to me because of my MS pain, so you don't have to feel sorry for me.)

I made this keychain as a last minute gift for Valentine's Day, but ended up giving the recipient something else. I get to keep it! Yea!

The idea came from a necklace I saw a lady had made, so you could easily turn this into a necklace instead. It would also be a beautiful tag for a nice gift!

It was simple to put together.

  1. Use Tombow Multi glue to glue the Designer Label Holder to the Designer Series Paper. I used the Sending Love DSP. Note: There is a punch for the Designer Label that you could use (and it would be easy to interchange papers), but I chose to glue it to the paper to make it more sturdy. Also, glue a Designer Label holder to a piece of plain cardstock. I used Very Vanilla.
  2. I stamped my image on the Very Vanilla cardstock using Chocolate Chip ink after it was glued to the label holder so I could see which stamp would fit. I used Schoolbook Serif Alphabet. There are many other alphabet stamps that would work in this situation too. You could also try Calendar Alphabet and Numbers to see if you could write a whole name!
  3. I added a small stamp of the flower from Tote-ally Tess to give a bit of color on this side using Pretty in Pink ink.
  4. Add Very Vanilla brads to the bottoms of both Designer Label Holders. Be careful to bend the legs of the brads upwards in a V shape to keep them from sticking off the sides.
  5. Use your scissors or craft blade to trim the excess paper around the Designer Label Holder. I angled the blade to the back of the holder just slightly to get the cut further in.
  6. Glue the two Designer Label Holders back to back with the brads at the bottom.
  7. Add a jump ring to the top going through both label holders.
  8. This is when you can add a clip as I did or a keychain link to make a keychain, or you can add a ribbon or chain to make a necklace!

Thanks for stopping by today.

signature

Page Number Item Price
155 101650 Very Vanilla Cardstock 8.5 x 11" $7.50
13 OM 117153 Sending Love Designer Specialty Paper $11.95
192 110755 Tombow Multi Purpose Glue $3.95
151 113510 Schoolbook Serif Alphabet $43.95
178 112454 Hodgepodge Hardware- Styled Vanilla $29.95
41 OM 118595 Tote-ally Tess $16.95

Monday, January 11, 2010

Quick Easy Gift filled with Hot Tips!

Aren't there times when you realize that you forgot to buy a gift for a friend or for a birthday party and the stores are closed? How about making a gift? I made this gift in less than 30 minutes. The gift inside is only half of the gift!


Here are the steps:
  1. Get a container large enough to hold your gift. Hot Tip: I used a clean icing container for this gift. Check out other containers before you throw them away. Pringles cans are great for T-Shirts, just be sure you clean it well first.
  2. Cut a piece of cardstock wide and long enough to cover the bottom of the can. Hot Tip: I measure the length by wrapping a piece of ribbon around the can. I used a ruler to measure the height of the can. Hold the spot where the ribbon meets then let the ribbon lay flat. Measure to the point where the ribbon met and this is the circumference of the can! Easy Peasy.
  3. The can top was already red, so I just played off this for the color scheme. Plus, it was a Christmas gift. Hot Tip: If you don't like the color of the container's top, put a band of ribbon around the edge and make sure your circle on the top completely covers the top. I left a bit of red lid showing on mine.
  4. Stamp and ink the edges of the cardstock. Hot Tip: I used one stamp repeatedly all over the cardstock. I double stamped it. I stamped once in the regular ink, then I stamped again in another location, which came out much lighter. This is a great idea for creating any background paper on the cheap!
  5. I used 2 ribbons around the center of the can. First, I used a wider ribbon, then the more narrow red ribbon. Hot Tip: Ribbon can be expensive to purchase, but when you figure how much it costs to create a project using ribbon, you will realize that it is a small amount of money that creates a HUGE impact!
  6. There are three different tags on the ribbon, attached by a brad. Hot Tip: Don't be afraid to double up tags. It really draws attention to your gift! Hand cut stamps that relate to your gift, or punch out simple shapes, stamp a greeting, and sign a blank one.
  7. Finally, I made the top section. I used the Circle Scissors to cut a circle big enough for the top, then inked it. I then punched out a 1 3/4" circle (I could have cut this with the Circle Scissors too). I finished the project with a Snowflake punch I put on dimensionals. Hot Tip: If you don't have a circle cutter, use a jar, plate, can, or anything round that you can trace a circle with, then cut the circle out with your scissors.
  8. What to fill it with for a very quick gift? Well, this particular can I filled with cookies for a friend. You could also add small inspirational quotes or Bible scripture that you spend just minutes looking up online, then print them on cardstock and cut them into strips. Make them even nicer by inking the edges or putting a small stamp next to each quote. If the gift is for a little child? Dump a box of crayons into the can and print out several coloring pages from the Internet that you make a cardstock, stamped cover for.
Even for a last minute/you completely forgot gift, this works great, and the receiver will think you spent a ton of time and money!! Thanks for stopping by today. Stampin' Up! has some great sales going on at this time! Contact me to book a party!

Friday, September 11, 2009

My First Swap

I am participating in a swap. That is where you create a card for each member of your group and they each create one for every member of the group. In the end you will have with as many cards as there are members of the group. I joined a Stampin' Up! SWAP of 8 people at It's Stamp Time Somewhere. Jeanna was kind enough to let me in the SWAP. I didn't realize it was hard for first timers to get into a SWAP group. She tells us which stamp set to use, and we all make a card using that set. We will end up with several cards using the same set to show how versatile the stamp set is to our customers at workshops and classes.

What is a workshop or class? A workshop is where I come to you and your friends to demonstrate or teach you how to make certain cards or some other small project to take home. A class is where you pay a fee, come to me, and we make several projects to take home. At each even you can order products from Stampin' Up! to help you get started at home on your own. Of course you can then get inspiration from my blog and others too.

Now back to this card for the swap. I wanted it to be very special, since it was my first swap. I am posting two photos for you. The first one to show you the card, but this second view used my flash to show you just how much this card really shines. It is so beautiful, yet so simple! I would love to have a tree full of these medallions stamped using this Simmer Paint. (If you do this, please come back and comment or email me so I can see photos, please.) I used Rich Razzleberry cardstock with the Silver Shimmer Paint, and it turned out so festive and rich.

Here's how to make the card:
Cut the Rich Razzleberry cardstock to 5 1/2" x 8 1/2" that is scored and folded at 4 1/4". I punched a Modern Label Punch from Whisper White carstock.For the stamping, I poured a dime sized amount of Silver Shimmer Paint onto the lid of a cool whip tub. Get a Stampin' Sponge and get just a little bit of Shimmer Paint on the sponge, then dab it over and over on a clean spot of the lid. This will distribute the paint all evenly over the sponge. If there is a glob of paint on the sponge, it will get into the depressions of the stamp and ruin the stamped image. Dab the sponge (do NOT rub) over the letters of the Merry Christmas from the Teeny Tiny Wishes Stamp Set. This paint does not dry as quickly as ink, so you do have plenty of time. Stamp the image onto Rich Razzleberry cardstock. Allow to dry. Punch out using the Word Window Punch. Paint the Modern Label Punch using the Silver Shimmer Paint. You may use either a paint brush or the sponge. Allow to dry.

Place a larger piece of scrap paper inside the folded Rich Razzleberry card (I learned this the hard way). Lay the card on a second piece of scrap paper. Use the sponge to dab Shimmer Paint over the the entire surface of the Medallion Stamp Set. Again, be careful to pounce the sponge on a clean area of the lid after dipping in more paint before you start dabbing the stamp again. It does not need a heavy coat of paint. Use the paint very sparingly. I will discuss problems with stamping below, which only happen if you put too much paint on the stamp, by the way. To stamp, you will place the stamp and apply pressure all over the stamp. Do not allow the stamp to move. Stamp the image on the Rich Razzleberry cardstock. Pick the stamp straight up. Allow to dry. Attach the dry modern label punch to the card using Snail Adhesive and the word window punch using Dimensionals on top of the label.

Mistakes:
  • On the sentiment stamp it is VERY important that you do not get too much paint in between the letters or it will not stamp clearly.
  • Well, as I said I learned the hard way that you stamp the image with the card folded, because if you don't your stamp may leave a gap right next to the fold line. Stamping with it folded leaves a perfectly clean image all over the front of the card.
  • Stamp with the card closed or the image may have gaps in it.
  • The entire stamp will not fit the front of the card. Don't stress if it goes off the edge on both sides or if it goes off too much on one side; all these add to the beauty of the image.
  • Also, if you apply too much paint (yes, I did this too) to the stamp, the stamp will want to slide on the card. Continue as normal and assess the damage. See what to do below for examples of what to do.
What to do:
Even if you make a mistake listed above, you still can produce a beautiful finished project. This card was stamped with the card open. The edge near the fold was missing. What to do? Add some Silver Stretch Cord tied in a bow to cover up the area!
In the tag below, I had put too much paint on and the stamp slid creating a smear at the bottom right. What to do? I trimmed off the back of the card. Trimmed off the mistake area. Used the Corner Rounder to round off the corners, then I punched a hole and added a piece of Silver Stretch Cord for a tag.
Finally, I stamped an image on an open card and didn't press in the left corner well, so I trimmed off the back of the card, trimmed off the mistake areas. I then used my craft knife to trim around the stamp leaving a small amount of Rich Razzleberry on each side to hold the image and added a Modern Label Punch painted in Silver shimmer Paint for a name or sentiment. I folded along that line and created either a place card or a small note/gift card.
Thanks for stopping by today. All products in Bold-faced type are Stampin' Up! Contact me to order. 334.493.2511 or creativepzazz@gmail.com.